Introduction
As part of the 3CX web client, users have the ability to view their calls in aggregated screen views via the
“Switchboard.” The switchboard is a feature that allows phone operators, queue agents and queue managers to view and manage calls in real time. To access the switchboard from within the 3CX web client, navigate to the
“Switchboard” page in the web client navigation menu.

Views
The switchboard offers five different views to choose from depending on your role within the organization and what information you require to be available to you for managing your calls.
All - A combined view of extension and queue calls.
Queue Calls - A combined view of queue calls.
Per Queue View - Shows the calls and agents on a per-single-queue basis.
Wallboard - A condensed view offering analytics for viewing on larger displays.
Reminders - You set reminders or wake-up calls to be initiated from within the 3CX web client.

All
This is the first view that a user will see when the switchboard is accessed. A combined view of calls to and from your extension and calls to queues. Incoming calls to your extension or to your queues will be displayed in the main screen.
Right clicking on a call provides instant actions to drop, divert the call or more depending on your rights.
Queue Calls
With the
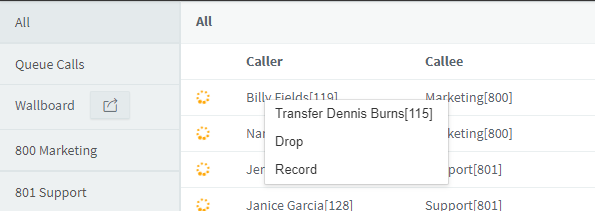
“Queue Call” view, the switchboard becomes an aggregated view of all queue call activity for which you are an agent or manager to. Incoming calls to queues can be easily managed by right clicking on a queue call providing actions to transfer to another agent or to drop, park or record the call.

Per Queue Views
Each queue within the switchboard of which you are either a member or manager for, will be displayed in the switchboard navigation with its corresponding queue name and queue number used to contact that queue. Clicking on the queue in the navigation will bring you to the switchboard view of that queue.
From the per-queue view, the information displayed and actions that can be taken are specific to a single queue. The main screen provides a list of active calls being serviced by an agent and incoming calls waiting in the queue to speak to the next available agent.

The view also provides the number of agents logged on to the queue and what their current status is.
Right clicking on a queue call in the main screen provides a menu with options on acting on the selected call to transfer to another agent or to drop, pickup or record the call.
In the footer section of the view, analytical data is provided that help determine the performance of the queue. This information can provide a fast way to determine if further actions are needed to help service a busy queue.
Wallboard
The wallboard view provides an informational screen that can be used on larger displays to keep agents informed on the status of the queues they are members of.

Reminders
The Reminder view allows you to see all the Reminders you have set. That could vary from initiating a call at a specific time to setting up wake-up calls for Customers.
To create a Reminder go to
“People’s” view, press on the
“Show more” button of the desired Contact and then
“Add Reminder.” Select the Date and Time and press
“Save”. The reminder has been created and is now accessible to view, edit or delete from the Reminders view.
Note: If you do not see the option to add a reminder or if you receive the notification
“Can’t set reminder” contact your administrator. Either you do not have the rights or the default Reminder / Wake-up Service IVR is not enabled.
Settings
Settings for the switchboard and wallboard features can be accessed by navigating to settings and then to wallboard or switchboard.
Switchboard
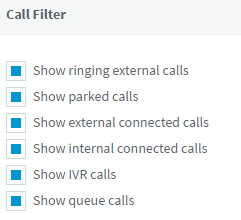
Call Filter
The call filter setting allows a user to configure which calls will be displayed within the switchboard. Filters provide flexibility on both extension and queue calls. By default, all filters are enabled.
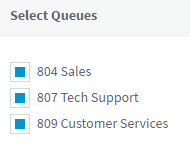
Select Queues
By default, a user has all queues configured to be displayed by default. This setting allows you to configure which queues are made available within the switchboard views on a per user basis. When a new queue is added or an extension is added to a queue for the first time, this queue will automatically be added to the queue view settings as enabled.

Wallboard
View Options
The wallboard can be customized to have a custom and optional message displayed on screen.

Select Queues
The wallboard displays analytics for all queues of which the extension is a member of. This is the default behavior of the wallboard. Queues can be enabled or disabled from the wallboard settings to include only the queues that you are interested in.